Building your virtual tour can seem challenging, but TourBuilder Go makes the process easy. Anyone can use the TourBuilder Go App to create easy-to-navigate and beautiful virtual tours.
Before You Begin
Before you make your way to your shoot location, make sure that your phone and camera are fully charged. The Ricoh Theta camera takes a while to charge, so plan accordingly.
Charge Your Kit
Before you go to your shoot location, ensure your phone, camera, and extended power bank are fully charged. A fully charged camera provides about 3-4 hours of capture time. The fully charged, extended battery bank will give a total capture time of about 10 hours.
Plan Your Shots
The first thing to do before you start capturing any content is to plan out your shots. Make a list of all the rooms or areas you want to capture. Knowing how many 360-degree panoramas (Panos) you’d like to capture throughout each area to speed up the shoot and alleviate mid-capture guesswork. Next, draw a pathway you will use as a guide while shooting your virtual tour. Make sure you know where your next capture point will be. This will prevent you from having to start over.
Here is a sample path to take:
.png?width=523&height=438&name=TourBuilder%20Go%20Walkthrough%20-%20How%20to%20shoot%20your%20unit%20tour%20(1).png)
Do a Thorough Walkthrough
It’s helpful to plan your path ahead of time and complete a walkthrough to prep the space. Here are some things you will want to check when you do your walkthrough:
- All lights are switched on with bulbs working
- Windows, carpets, and mirrors are cleaned
- Chairs positioned and organized
- Tables set
- Counters and tables de-cluttered
- Visible areas clear of stray items
- Garbage bins are empty and out of view
- Cords and wires are hidden
- All fans, TVs, and any other moving objects are off
- All doors between rooms you intend to capture are open
- Window blinds open to let in natural light
- The camera lens is wiped down
When You Are Ready to Start Capturing
Once you have fully prepared the space and planned your path for shooting your TourBuilder Go virtual tour, these best practices will help you capture a fantastic tour.
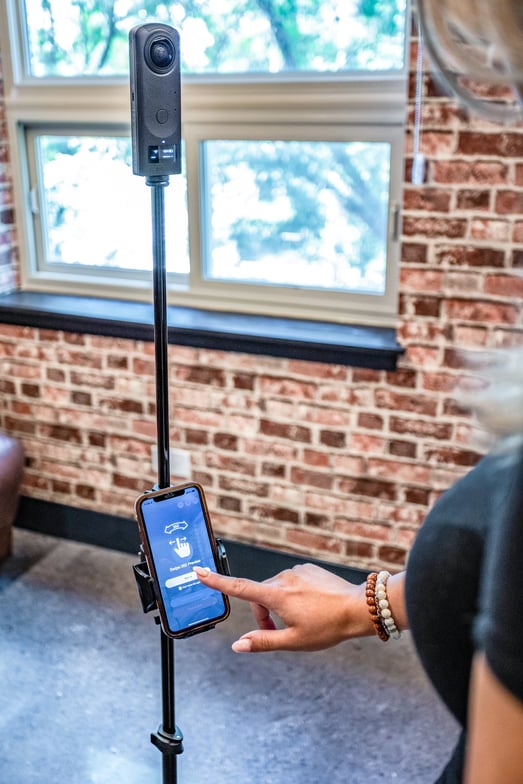
1. Phone and Camera Alignment
When setting up your tripod, aligning the Ricoh camera screen with your phone’s screen is important. For more details, reference our alignment guide.
2. Keep the Same Compass Direction of Your Tripod With Every Shot
Keeping the tripod facing the same direction is important throughout the virtual tour shoot. For example, if you shot your first pano facing the balcony to the North, you should maintain the tripod facing North for every following pano you will capture for that tour.
TourBuilder Go takes the GPS data from the camera and your phone to establish which direction you are facing. So, avoiding twisting the tripod between panoramas maintains consistent arrow placement in the finished tour.
Remember that this is a 360-degree photo, so turning the camera to feature a specific amenity or design choice does not matter, as it will still capture the entire room.
3. Maintain Consistency With the Distance Between 360-Degree Panos
The rule of thumb is to capture a panorama every 3-4 feet. This ensures that areas are captured, a walking path is clear for the potential resident when traversing the tour, and line-of-sight is best maintained. This distance can be extended to 6-8 feet per pano for areas like hallways, where the same area is captured for more than three consecutive panos.
4. Line of sight
Line of sight means a visible connection between each pano taken, which ensures your scenes connect properly.
Here are a few ways to accomplish line-of-sight:
- Before entering a room or area, capture a 360 photo at most 3-4 feet outside the door. Remember to keep doors open when capturing outside of doors leading into the next area. This ensures that the next 360-panorama captured can be linked to the previous capture point once all panos have been uploaded and the tour is being put together, further ensuring that your scenes link together.
- Make sure that your 360 scenes will connect without obstruction. Position the tripod so that you can see the location of your previous scene and the next scene you want to capture. Your scenes will connect between capture points. So this will avoid jumping through walls, closed doors, or other obstructions like counters and furniture.
- It’s a good idea to envision a walking path when capturing panos around obstructions; that way, it’s easier to see if it’s necessary to go around an object to include the entire space.
5. Avoid Capturing 360 Panos in Front of Reflective Surfaces
By nature of a 360-degree panorama, it’s even more crucial that reflections are avoided so that the tripod is not present in captures taken. Common areas where reflections are present are within bathrooms. Mirrors are typically positioned in front of sinks, so placing the tripod away from this spot is best to ensure your tour looks as professional as possible.
/LCPMedia.com/KB/TourBuilder%20Go%20-%20avoid%20mirrors.png?width=688&height=387&name=TourBuilder%20Go%20-%20avoid%20mirrors.png)
Here are a few ways to mitigate reflections:
- With the door open, capture a 360-degree panorama 3-4 feet outside the bathroom entrance. Usually, one capture outside of the bathroom looking in can capture the entire space.
- Capture a 360-degree panorama in front of the toilet. Typically, mirrors are not positioned in front of these areas.
By following these steps, you can ensure TourBuilder Go will auto-build your tour properly, your tour looks professional, and the tour navigation will be seamless.
Use the Entire TourBuilder Go Kit
Your TourBuilder Go Kit includes everything you need to shoot a virtual tour except a cell phone. You do need everything (except the stickers). To maintain consistency, please use the Ricoh Theta 360 camera, tripod, battery bank, and phone mount every time.